Automate Researching Cal.com Bookings
Looking for secure MCP controls to connect AI and your work apps? Check out Turbo MCP, our self-hosted enterprise tool management solution: https://dylibso.ai/#products
This tutorial guides you through creating a mcp.run Task that automatically handles inbound lead research through Cal.com booking requests. Save hours of time researching inbound leads with AI.
This Task will:
- respond to Cal.com Webhook triggers each time your calender is booked
- run deep research via Perplexity, and scrape URLs with Firecrawl
- suggest an action plan optimized to your sales process or custom goals
- summarize guest & plan details in a Slack message
Prerequisites
Before starting, ensure you have:
- A Cal.com account
- A GitHub or Google Account for mcp.run authentication
- Access to mcp.run
- API Keys from Perplexity, Firecrawl, and Slack Bot ID and Team ID.
Required Tools
This tutorial requires the following mcp.run servlets:
- Perplexity - To search for information about the inbound lead
- Firecrawl - To scrape detailed information from URLs found by Perplexity
- Slack - To send the summarized research report to you
For Slack Users
In order for the Task to communicate with Slack, you will need to @mention the
@mcp.run bot in the channel you want to send the research report to. Be
sure you do this after you install the Slack servlet!
Note: if you don't use Slack, you can use any other servlet that can send you or record output (like email, Teams, Notion, etc)
Install each servlet by:
- Visiting the respective URLs above
- Click the 'Install' button and fill in the required configuration
- Verifying they appear in your install profile
Create Your Researcher Task
Now we will create our Task instructions. If you haven't yet, be sure you have signed up for mcp.run, where you'll have plenty of free credits to get started and run this task.
Click the "Tasks" button in the navigation header of the webpage, and you're ready to go.
Give It a Name
Use something recognizable, like "New Cal.com Event", in the title box. This can't be edited later, so you'll need to delete your Task and create a new one if you don't like the name you pick.
Set The Instructions
Each task requires instructions to follow.
Take special note to replace the values inside the
<BRACKETS>below with your own information.
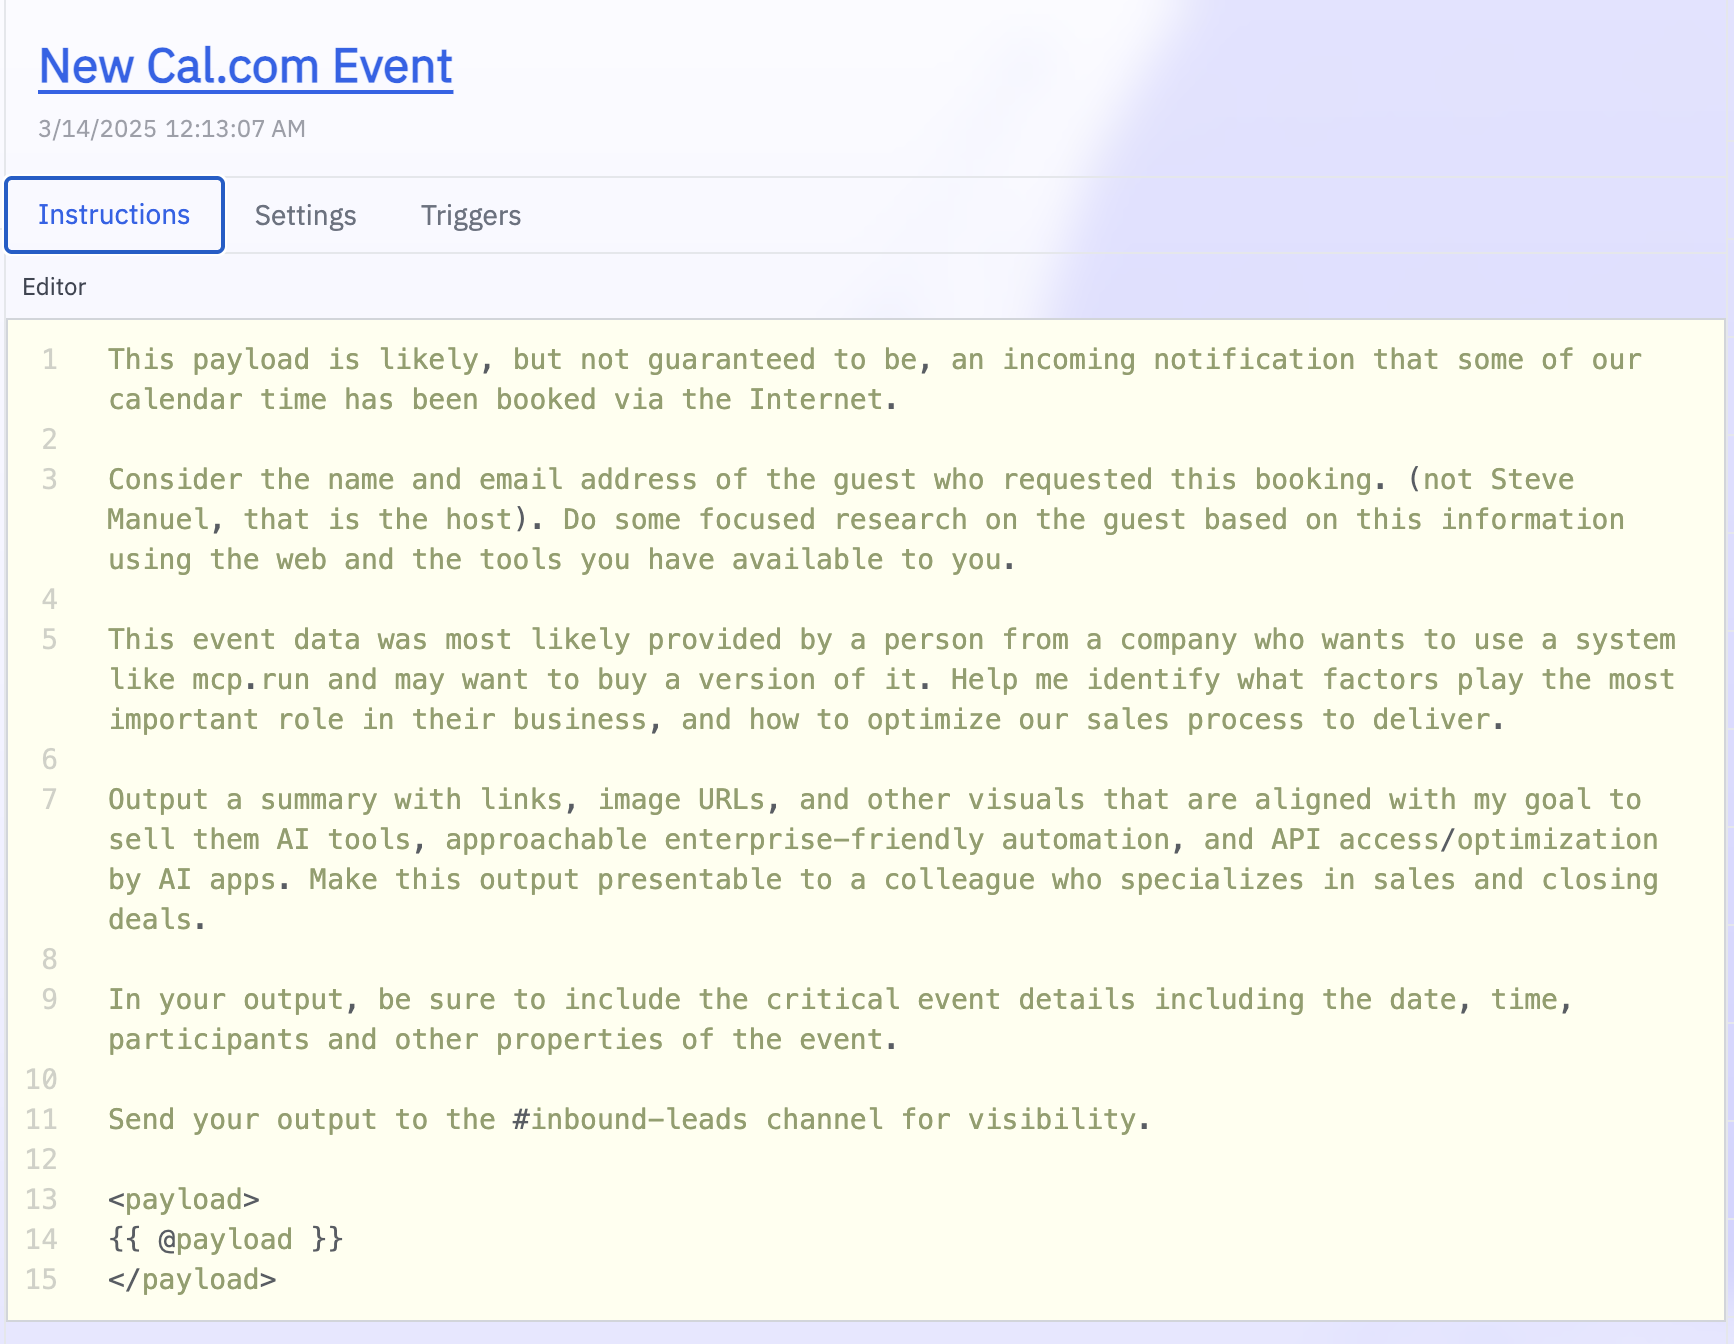
Copy & paste the following into the large Instructions box:
This payload is an incoming notification that someone wants to meet with me.

Consider the name and email address of the guest who requested this booking.

(not <INSERT YOUR NAME>, that is the host).

Do some focused research on the guest based on this information.

Use the web and the tools you have available to you.

This event data was most likely provided by a person from a company who wants to use a product <INSERT YOUR COMPANY WEBSITE URL> and may want to buy something from us.

Help me identify what factors play the most important role in their business, and how to optimize our sales process to deliver.

Output a summary with links, image URLs, and other visuals that are aligned with my goal to sell them our products.

Make this output presentable to a colleague who specializes in sales and closing deals.

In your output, be sure to include the critical event details including the date, time, participants and other properties of the event.

Send your output to the #<INSERT YOUR SLACK CHANNEL NAME> channel for visibility.

<payload>
{{ @payload }}
</payload>
Note: the
{{ @payload }}variable is a special value that takes the entire input from the Webhook event data and provides it to the AI to analyze.
When this is all set and done, you should have something that looks like this:
Assign a Profile
Every Task needs an attached Profile that contains the tools/APIs you want the
Task to use. Be sure that your selected profile has Perplexity, Slack, and
Firecrawl configured and installed properly.
The default profile should be pre-selected. You can use any other Profile if
you have created others and installed these tools there instead.

For help configuring and installing these, please refer to this section of the docs.
Select a Model Provider
Give the Task access to an AI provider of your choice, or use our free credits
using the default credits provider. If you're just getting started, use the
credits provider, you can change this later if you'd like!
Save Your Task
Click the Create Task button, and you're ready to configure the Cal.com
Webhook.
Copy The Task's Signed URL
Click the Triggers tab above the Task, and you should see a section for Signed
URLs:
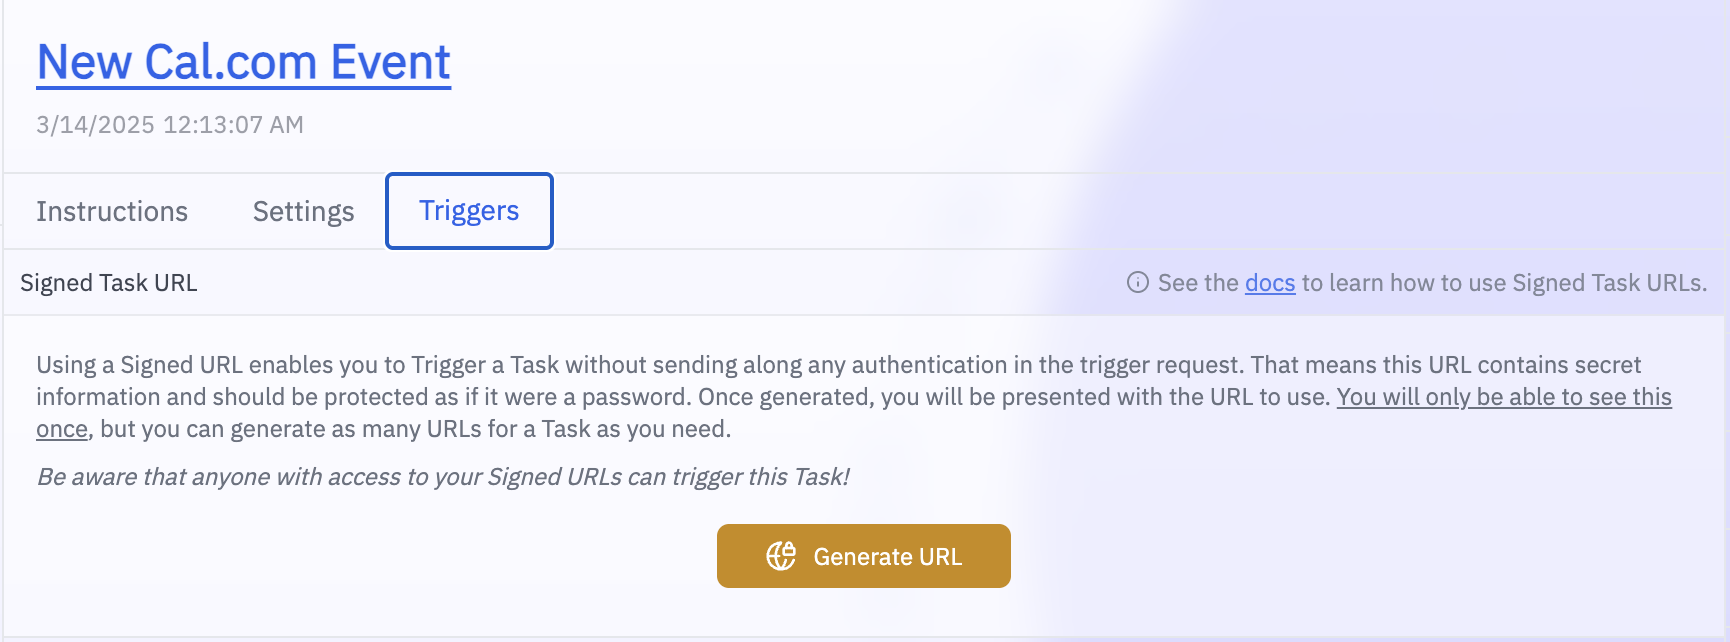
Click the Generate URL button, and copy the URL that pops up.
DO NOT SHARE this with anyone or post it anywhere public. Treat this like a password. Anything with this URL will be able to trigger your task, and deplete your credits.
Create the Cal.com Webhook
Go to your Cal.com calendar where you want the trigger to happen (wherever a lead will book time with you).
Navigate to the Webhooks section from your Dashboard, which can be found at a URL like:
https://app.cal.com/event-types/{EVENT_ID}?tabName=webhooks
You should see a "+ New Webhook" button. Clicking it will launch a popup like this:
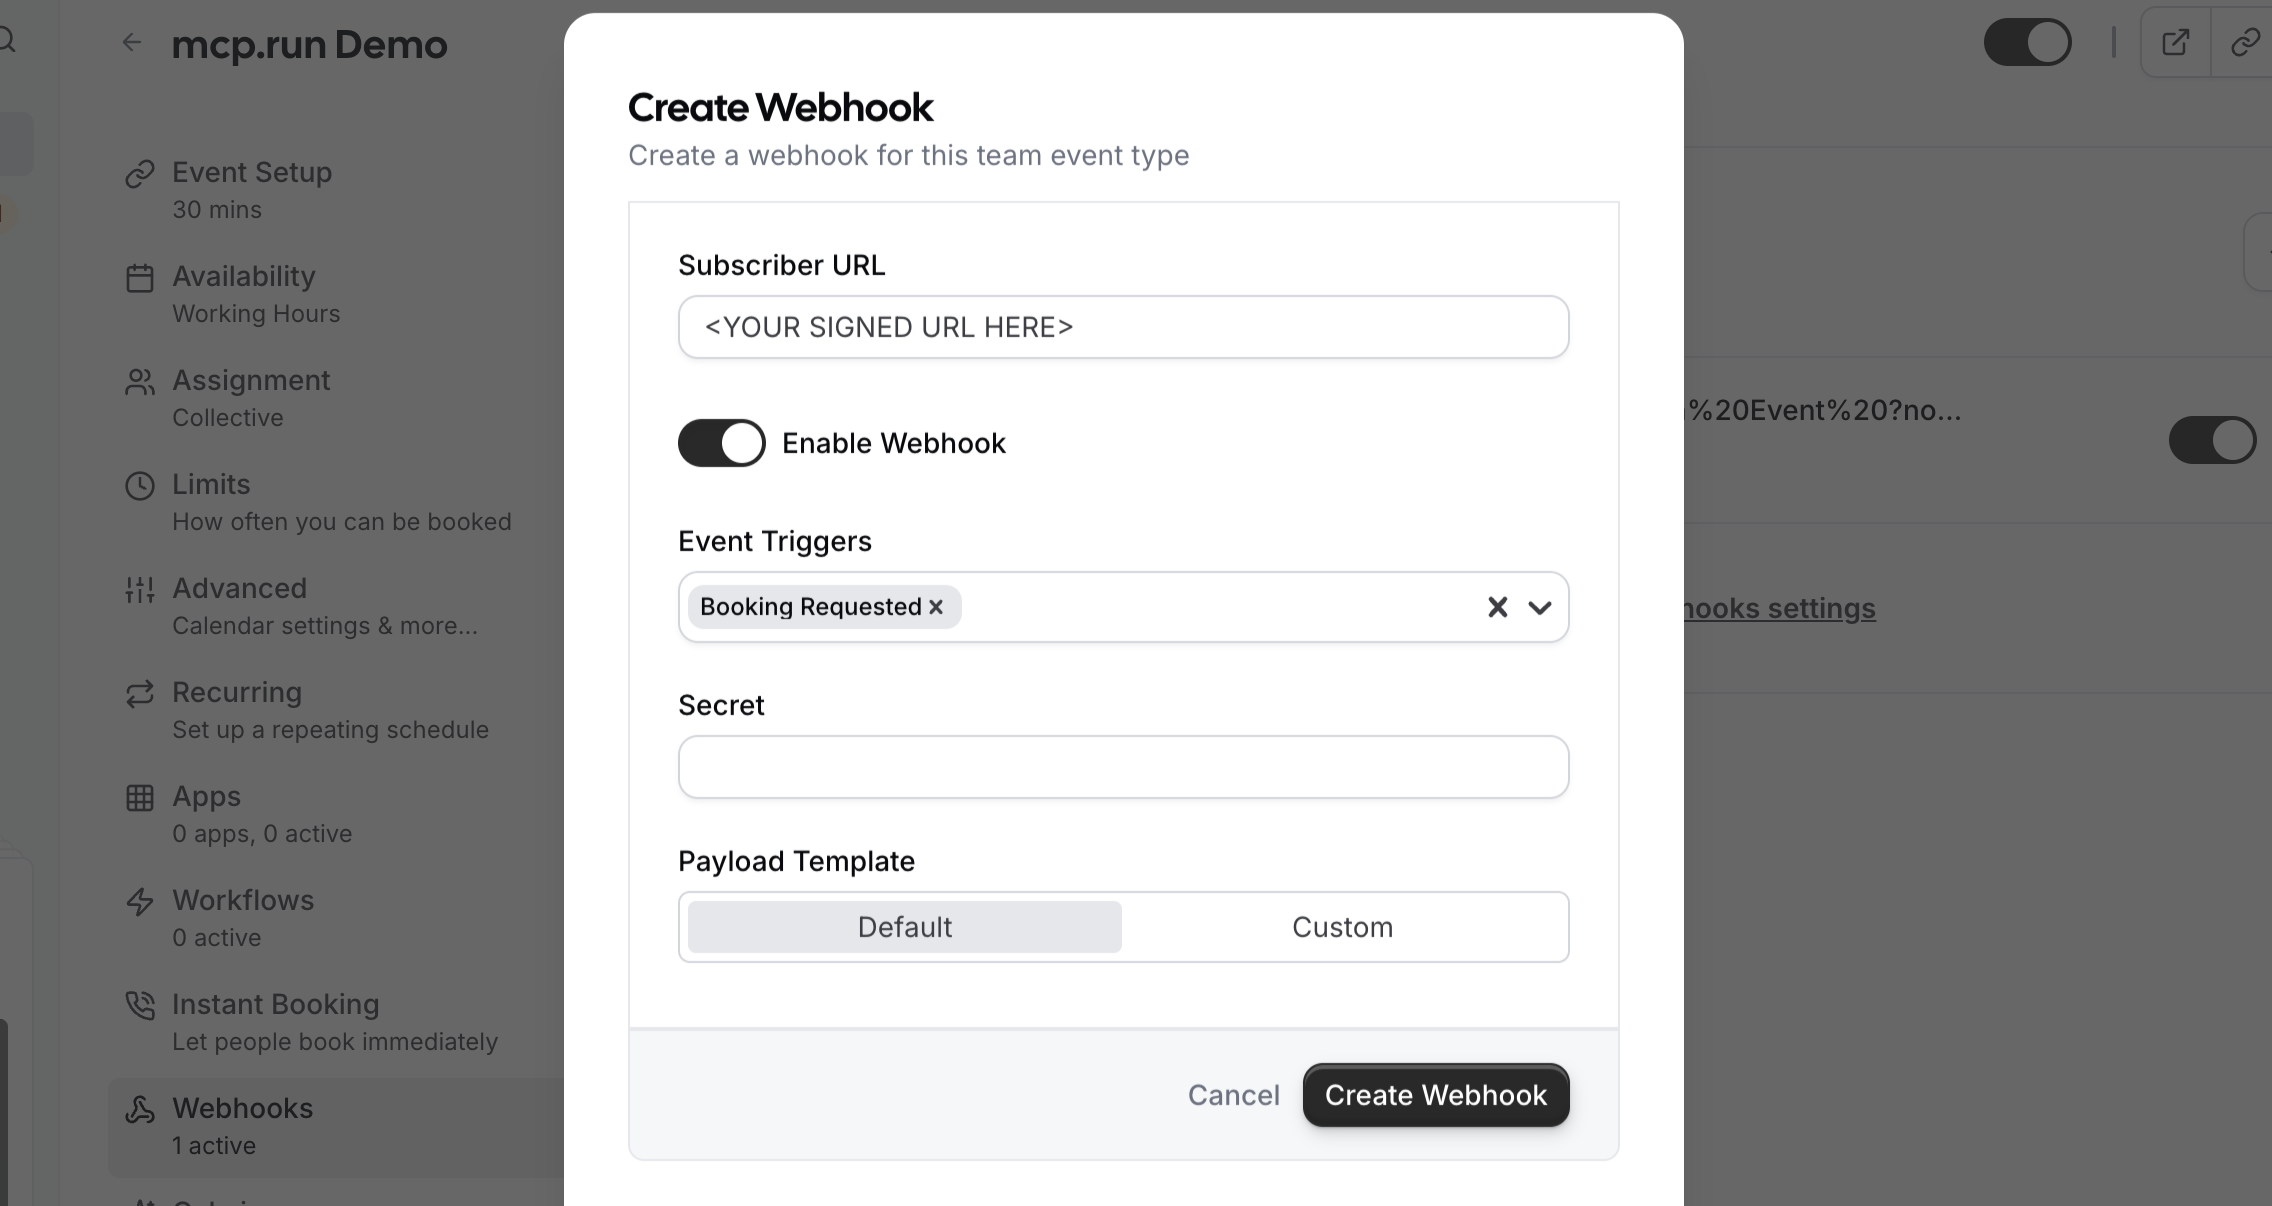
Now, paste the Signed URL from the Trigger tab on mcp.run into the "Subscriber URL" field.
Remove all of the trigger events besides "Booking Created", as the others will cause unnecessary noise and costs.
Click "Create Webhook", and if everything works, you are good to go.
You can add whichever triggers you want here, and get creative! This specific
tutorial for researching a lead only needs the Booking Created event, but you
can make all kinds of automation tasks with the other events too.
Test It Out
Once you have saved this Webhook, you can send a test ping via the Webhook configuration on Cal.com, or you can go to your live calendar and add a booking request. You should see the Task running in your mcp.run Tasks dashboard. You can follow along with its progress, or just wait for your report to land in Slack!
Support
If you encounter issues or need help, please visit our support page for additional assistance.