Looking for secure MCP controls to connect AI and your work apps? Check out Turbo MCP, our self-hosted enterprise tool management solution: https://dylibso.ai/#products
Integrating mcp.run Tools with Mastra AI
This tutorial will guide you through integrating mcp.run tools with Mastra AI for building intelligent agents. We'll see how we can create an agent that can use mcp.run tools to get realtime weather information.
Prerequisites
Before starting, ensure you have:
- Node.js v20.0 or higher
- A GitHub or Google account for mcp.run authentication
- An OpenAI API key
Step 1: Set up mcp.run
Create an account on mcp.run, if you have not already. You will install & authenticate tools inside your account, and access them from your Mastra Agents.
Step 2: Create a New Mastra Project
Let's start by creating a new Mastra project using the create-mastra tool:
npx create-mastra@latest
You'll be prompted for the following (for this tutorial, choose the values below):
┌  Mastra Init
│
◇  Where should we create the Mastra files? (default: src/)
│  src/
│
◇  Choose components to install:
│  Agents
│
◇  Add tools?
│  Yes
│
◇  Select default provider:
│  OpenAI
│
◇  Enter your openai API key?
│  ○ Skip for now
│  ● Enter API key
│
◇  Add example
│  No
│
◆  Make your AI IDE into a Mastra expert? (installs Mastra docs MCP server)
│  ● Skip for now (default)
│  ○ Cursor
│  ○ Windsurf
└
Finally, install the MCP utility from Mastra:
npm i @mastra/mcp
Step 3: Add mcp.run Integration
Log into mcp.run, and install the Weather Service tool. You'll need to get a free API key from: weatherapi.com.
Clicking the Install button will ask you to target a Profile to install the tool, just use the default as it was automatically created for you. If you already have other profiles made, you can install it into any profile you'd like.
Add your API key into the WEATHER_API_KEY input, and click Save. You will be
redirected to your Profile, where you can confirm the tool is installed.
Finding your SSE URL
Go to your Profiles page, and find
the profile you installed the weather-service tool into.

You'll see a ⌥ SSE button, which when clicked, enables you to generate a
signed URL to copy.
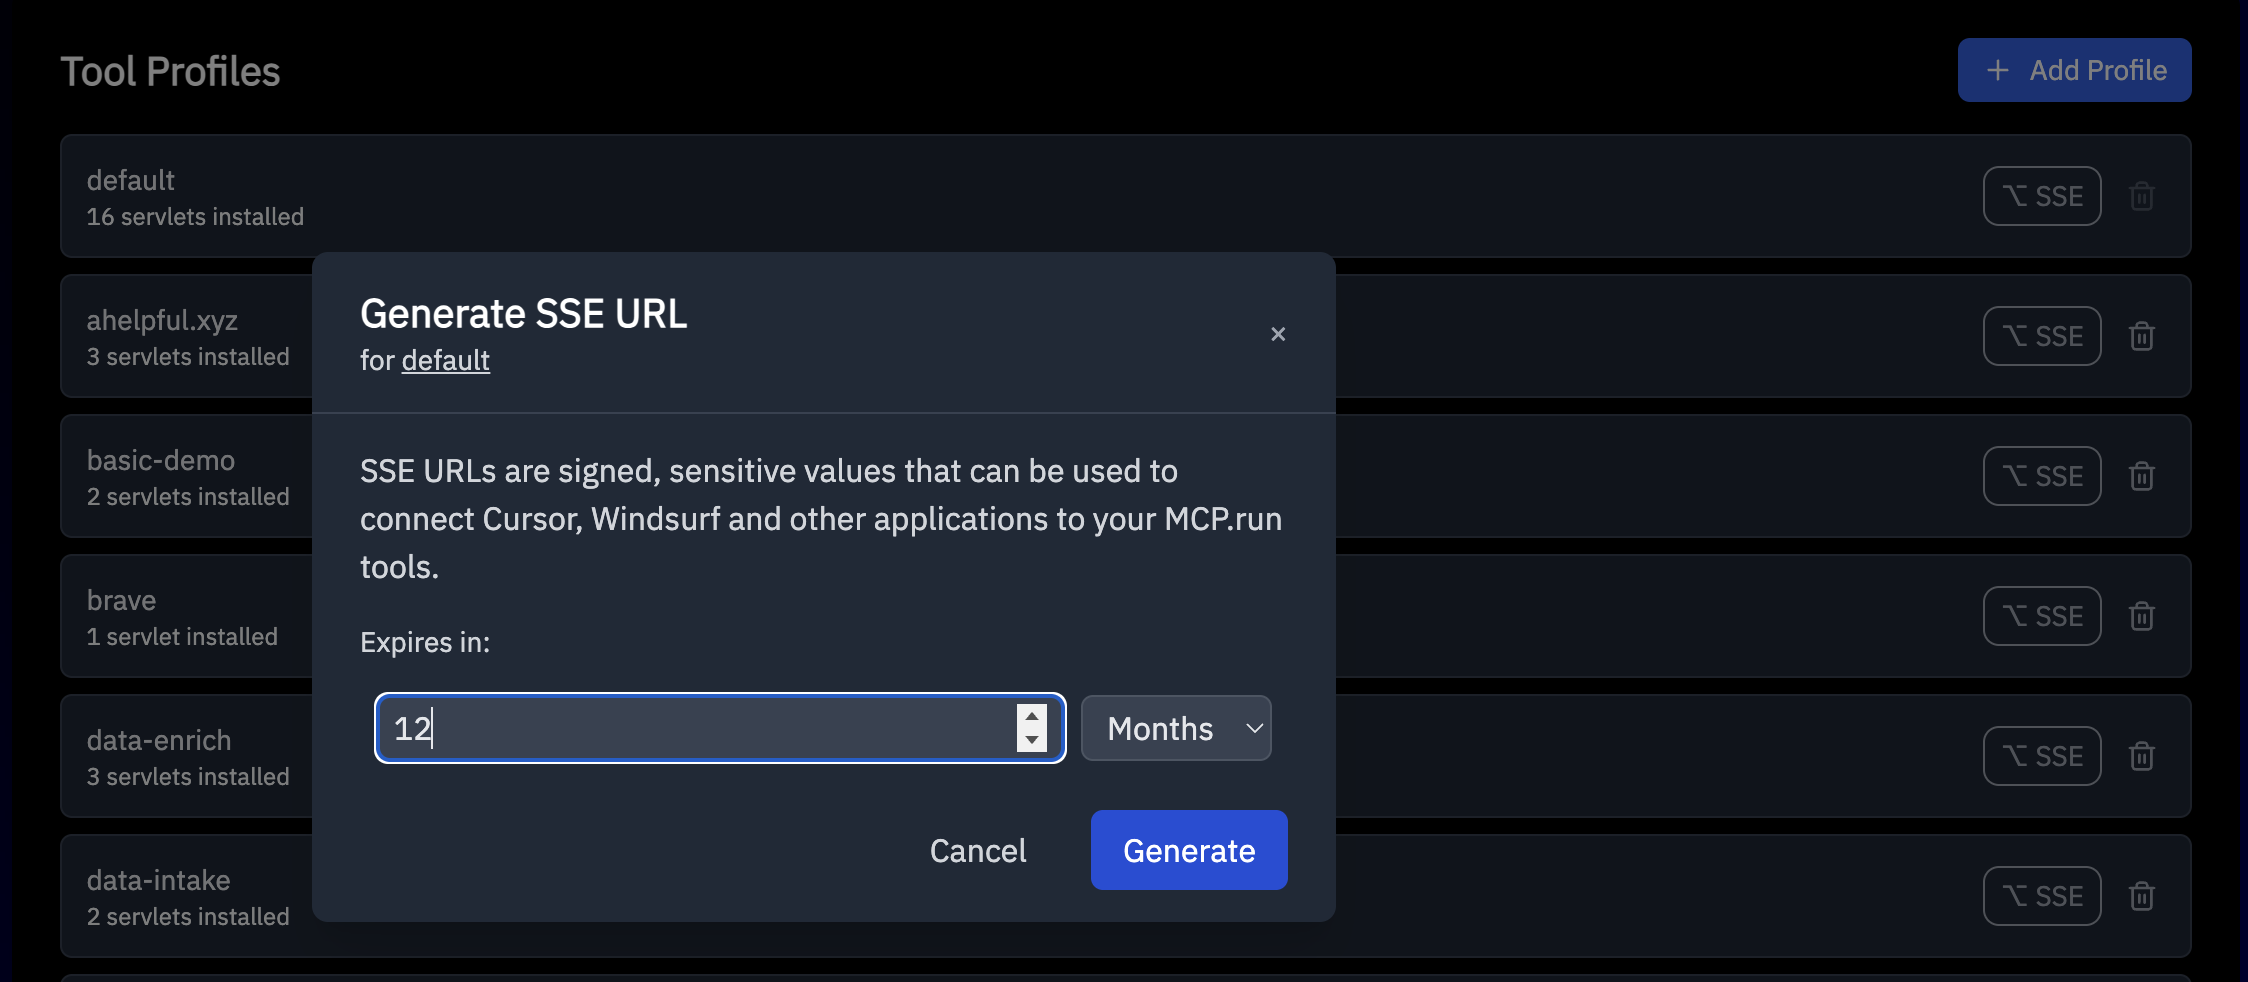
Set it to any expiration you'd like, and click "Generate". Copy this URL, and treat it like a password.
SSE URLs carry authentication info in them, and should be kept secret! Using this URL, any MCP Client can access and execute your tools within the Profile the URL was generated from.
Add the URL to your .env file
In your Mastra project, you'll see a .env.development configuration file. Add
your SSE URL to this file on a new line like this:
OPENAI_API_KEY=sk-*******
MCP_RUN_SSE_URL=<PASTE SSE URL HERE>
Step 4: Create the Weather Agent
Open the file src/mastra/index.ts:
import { Agent, Mastra } from "@mastra/core";
import { MCPConfiguration } from "@mastra/mcp";
import { openai } from "@ai-sdk/openai";
import process from "node:process";

const mcp = new MCPConfiguration({
  servers: {
    weather: {
      url: new URL(process.env.MCP_RUN_SSE_URL!),
    },
  },
});

const weatherAgent = new Agent({
  name: "Weather Agent",
  instructions:
    `You are a helpful weather assistant that provides accurate weather information.
Your primary function is to help users get weather details for specific locations. When responding:
- Always ask for a location if none is provided
- If the location name isn’t in English, please translate it
- Include relevant details like humidity, wind conditions, and precipitation
- Keep responses concise but informative
Use the weatherTool to fetch current weather data.`,
  model: openai("gpt-4o-mini"),
  tools: await mcp.getTools(),
});

export const mastra = new Mastra({
  agents: { weatherAgent },
});
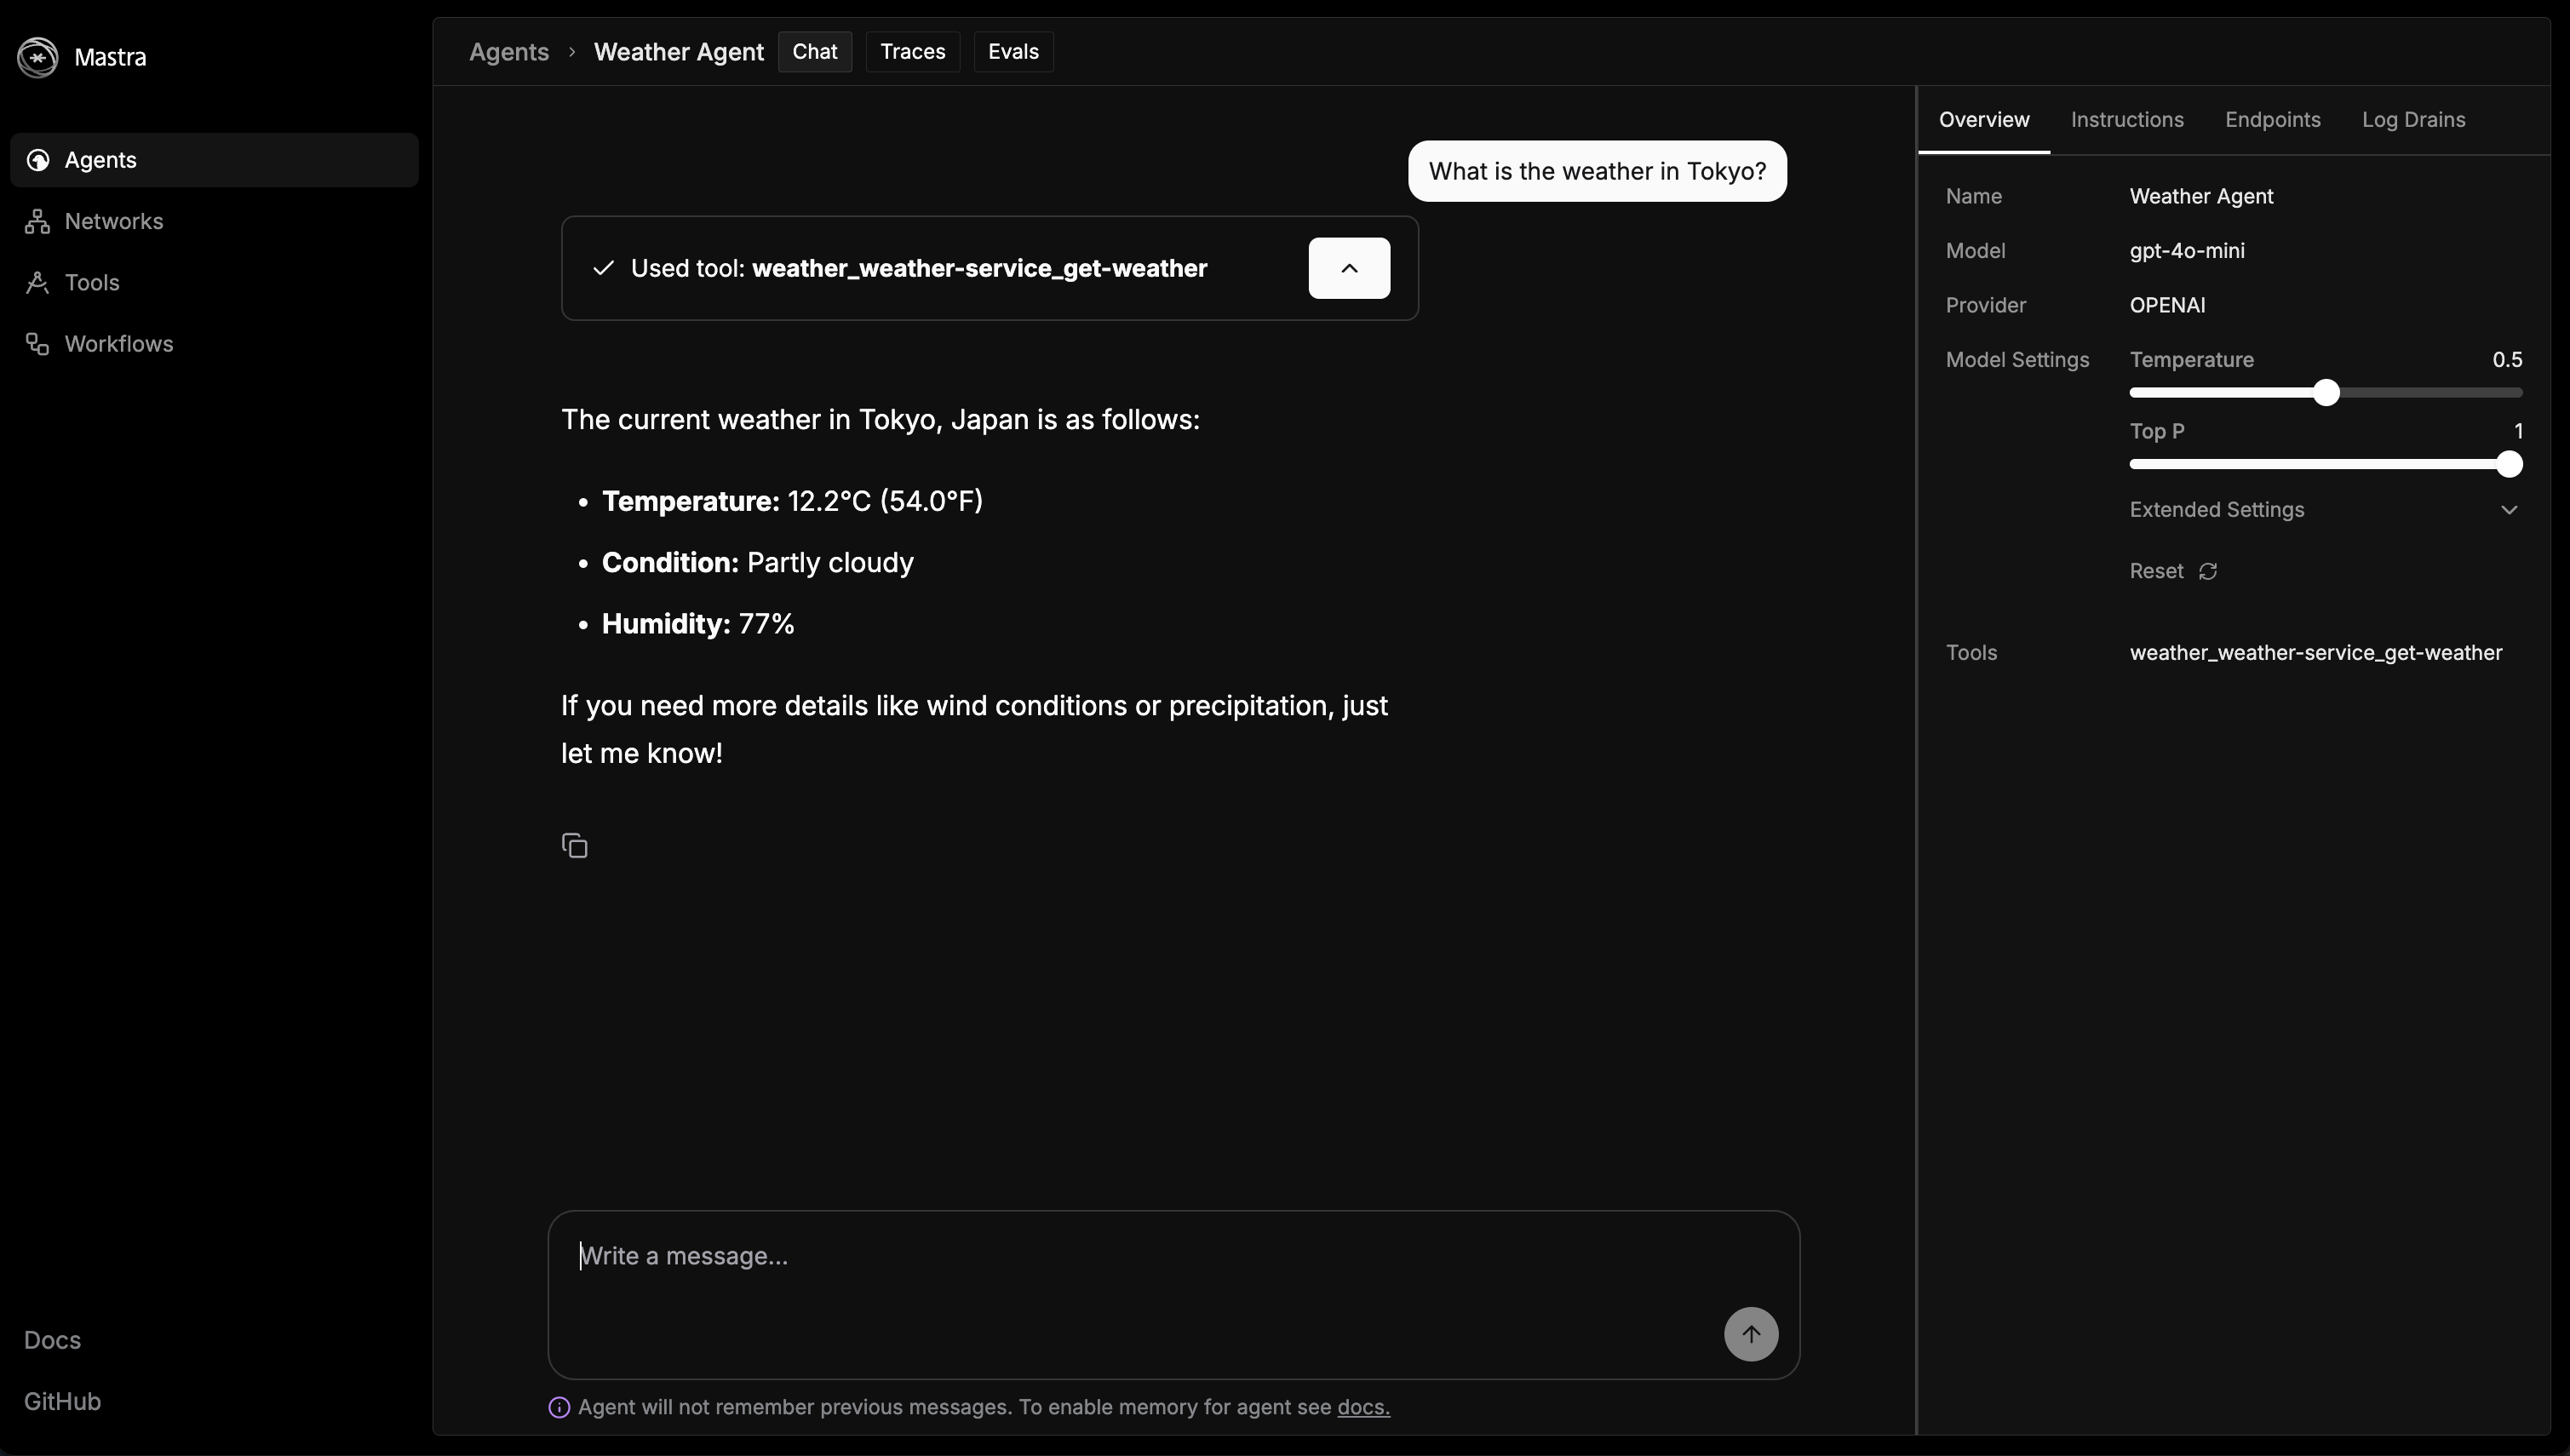
Step 5: Testing it out
- Start the Mastra development server:
npm run dev
Go to http://localhost:4111/agents/weatherAgent/chat, and then you can start
using the GitHub agent:
You can also use this Agent as a service, or incorporated into other parts of an
application using Mastra Agent's generate() and stream() functionality.
Learn more about that in Mastra's docs
here.
Support
If you get stuck and need some help, please reach out! Visit our support page to learn how best to get in touch.